
Content creators are joining the video revolution every single day. Posting video on different social media platforms used to be difficult and time-consuming. Thankfully, now we have tools to help us create video faster and easier with mobile video editing. Adobe Premiere Rush is one of the favorites. If you are looking into making and sharing videos from your mobile device, we’re going to show you how to get started with Adobe Rush.
Why Adobe Rush?
Adobe Premiere Pro and other professional video editors are great for video editing. But Adobe Premiere Rush streamlines the process in a way which helps content creators save tons of time. First off, Adobe Rush is available on desktop, tablet, and mobile with the same functions on every device. Projects are synced with the cloud and edits can be done on any device. This is a game-changer for social media managers who need to post video fast and without much hassle.
The Adobe Rush video editing app doesn’t only have video editing tools, you can also edit audio tracks, titles, and transitions. It also has color correction capabilities, much like Adobe Premiere Pro. Additionally, finished videos can be shared to social media straight from the app. The app has everything a social media content creator needs to make and share videos on the go.
A huge plus for Adobe Rush is that you can change the screen orientation with one button. It’s just as easy to make landscape video as it is to put together a vertical or square video. The adjustment controls help get the clip positioned perfectly where you need it, no matter what the screen orientation is.
Getting Started
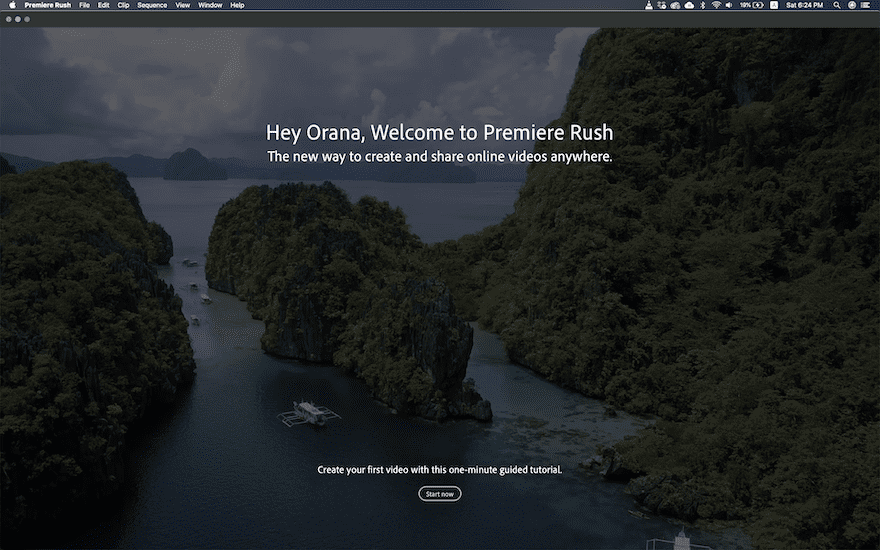
Now that you know how practical this app is for your content creation, let’s get it on your devices. To download Adobe Rush on your phone, visit the Apple Store or Google Play Store. If you don’t have an Adobe account, it will ask you to create one. Next, visit the Adobe site and download the desktop app from there. The onboarding process is the same on all devices. Once the app is installed, it takes you on a short tour to create y0ur first project. The app has some sample clips to make that process easier.
After you’ve finished the tutorial, you are ready to create your own videos.
Let’s take a look at the interface so see what tools you have available. Here is a video from Dansky which takes you through the onboarding process.
The Interface
The Adobe Rush interface is like a streamlined version of Adobe Premiere Pro. Let’s review the desktop version so you have a better idea of what’s available. The mobile version has all the same functions, just a bit tighter. It will be easier to get accustomed to the controls with the desktop app first, then move on to the mobile app.
The Editing Window
The main window is where the video is displayed as it’s edited. There are play controls underneath it to preview changes, titles and transition effects. You can make this window fullscreen to preview the video without all the toolbars around it. On the bottom right corner is the toggle for the screen proportion. When you change the screen proportion you will need to adjust the placement of the clip with the transform tools on the right bar.
The Top Bar
Above the video-window are the home, edit, and share buttons. From here you can navigate to your other projects, or share a finished project to social media.
The Bottom Bar
On the bottom of the screen, you have the timeline and track controls. When you zoom in, the tracks will show more frames. If you zoom out, the tracks will simply show a preview of each clip. There are five tools on the left of the timeline.
- Scissors
- Duplicate
- Trash
- Expand Audio Track
- Manage Tracks
Most of these are self-explanatory but to one worth mentioning is the scissors tool. The timeline has yellow draggable controls to adjust the length of each clip. There is also a blue marker which can be dragged to any position in the timeline. If you click on the scissors icon, the blue marker will cut a clip into two clips, using the marker as the cut point.
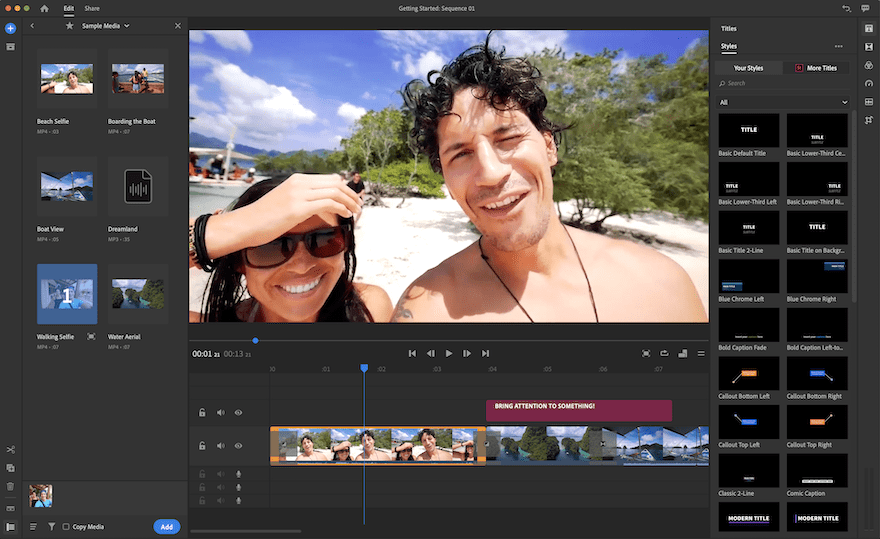
The Left Bar
On the left of the video-window are two buttons. A blue plus button which opens up to a popup with the choice of Title, Media, or Voice over. When you select Media, it will ask if you want to choose sample content or if you want to use media from inside any folder in your computer. There is also a dropbox and cloud integration. The other button is for the project assets. When you click it, a window opens up showing all the clips, photos and audio clips in the current project.
The Right Bar
To the right is the bar for extra editing tools. The six icons in this bar are,
- Titles
- Transitions
- Color correction
- Speed controls
- Audio controls
- Transform options
With these tools, you can personalize your video in many ways. There are a number of title options in the app itself, but you can also access other styles from Adobe Spark. There is plenty of color correction presets and you can also create your own.
Getting Creative with Adobe Rush
Now that you know the basics of Adobe Rush, it’s time to get creative. YouTubers, vloggers and travel video creators are all using Adobe Premiere Rush because it’s so practical. Since the app is available to use on the phone or tablet, it makes mobile video editing and sharing easier than ever. This is easily one of the best tools for digital nomads and mobile social media managers.
You want to learn some tips and tricks? Here are some practical tutorial videos.
The first video is all about transitions and how to use them your advantage.
The second video is about color correction and how to make your clips look more cinematic.
Adobe Premiere Rush is the perfect tool for YouTubers, as this video will show you.
Most video tutorials show how to use Adobe Rush on the desktop, but this one is done fully on a mobile phone. Specifically, a Samsung.
The last video is not about Adobe Premiere Rush, but it’s highly valuable for anyone making videos. Here are the 9 cuts every video editor should know.
Go Get Editing!
Are you ready to use Adobe Premiere Rush to create videos fast? In this post, we walked you through the first steps to get started with Adobe Rush. We also showed you some practical tutorial videos to get more creative with your editing. Have you tried the app yet? Leave us your comments below!
Featured image via TarikVision / shutterstock.com
The post Get Started with Adobe Rush – Easy Mobile Video Editing and Sharing appeared first on Elegant Themes Blog.