
An email signature is perhaps the most neglected opportunity in business communications. A well-designed email signature gives you one last chance to provide information or even a call to action. If your email signature is designed well it will make you look more professional and it can lead to more conversions.
Email signatures can open opportunities to connect on social networks, show a book or article, create a call to action, and provide all of the best contact information in one place. If they’re designed well they can make you money. In this article, we’ll look at how to write a professional email signature that converts.
Build Your Email Signature
A professional email signature could include 3-4 lines of text, an image, social media links, and an interesting layout. You can even include animation or a simple call to action. The most important thing to remember is to keep it easy to understand.
You can create your signature as simple text, but you get the best results by building them with HTML. You can build them by hand or with an email signature builder. Practically every email client includes a signature option in the settings. Once you’ve created your signature you’ll just need to paste the code into your email client’s settings.
Basic Email
Start with the foundational text and then add to that. Use 3-4 lines of text. Keep is simple but informative. Don’t over think it. A simple template might look like this:
Your Name
Your Title and Company (with a link to the website)
Phone Number
If I were creating one for Elegant Themes, it would look like this:
Randy Brown
Blogger | ElegantThemes.com
123-456-7890
Email with Social Links
Add any network that works best for you and your genre. Make the social media icons clickable. Only add the most important networks for your business communications. If they have too many to choose from they’re more likely to ignore them all. This example places them under the text:

Email with Content
You can add a link to your product or article that you want to showcase. You could even include an image of the product or article. Here’s a simple example:
Randy Brown
Blogger | ElegantThemes.com
Author of Why Divi Rocks
Email with Call to Action
You could add a simple call to action as a link at the bottom of your email. It should just be a single line that alerts to a download, asks to schedule a call, attend an event, or just about anything that’s related to your business.
It might look like this:
Randy Brown
Blogger | ElegantThemes.com
Email with Image

People remember color images better than they remember text or even black and white images. This is why logos are so important. Don’t use just any image. The best option is to use your portrait because it’s more personal to you. This can be your avatar or Gravatar. People like to put faces to names, especially in a professional environment. Don’t just use a photo though. It still needs the supporting text.
Don’t include Too Much Information
Don’t try to include everything. Keep it simple. Less is more.
Here’s an example of a good signature (before we spruce it up with HTML):
Randy Brown
Blogger | ElegantThemes.com
Twitter: twitter.com/example
Here’s an example of a bad signature:
Randy Brown
Blogger | ElegantThemes.com
123-456-7890
Author of Why Divi Rocks
Product 1
Product 2
Product 3
Facebook: facebook.com/example
Twitter: twitter.com/example
LinkedIn: linkedIn.com/example
YouTube: youtube.com/example
Skype: example
Email: randybrown@exampleemail.com
This one has so much information that it will probably just get ignored. Of course, it could be cleaned up a little by using social icons, but there’s still too much here.
You Don’t Need to Include Your Email Address
Many email signatures include the email address, but it’s not really necessary. They already have your email address in the FROM section in the email header, so it’s okay if this information isn’t included. In most email clients you can hover over the sender’s name and it reveals the address in a popup (or, tooltip). If it doesn’t show, then you’ll see the address when you click to reply.
Adding it again is just adding clutter, and if there’s too much for them to look through they’re more likely to ignore it all together. I’ll add it if I have room, but if it starts to seem like I have too much included then the email address is the first thing to go.
Don’t use Fancy Quotes or Cute Images
Quotes and cute images look like a personal email rather than a business email. Keep the content focused on your business and provide information that supports your business.
Creating a Mobile Signature
As strange as it may sound, studies show that a signature that states Sent from my iPhone retains credibility even if it has spelling and grammar errors, while those sent from a desktop that contains errors lose credibility. People tend to be more forgiving because they know the difficulty of typing on a mobile screen on a device that corrects your spelling when it doesn’t actually understand the business you work in.
This is an excellent approach to communicating with mobile, but not everyone uses iPhone. An alternative is to create a mobile signature that apologizes for spelling and grammar.
Create something like these examples:
- “Sent from mobile. Errors guaranteed.”
- “Sorry for the errors. My phone isn’t really that smart.”
- “All errors added by my phone.”
If you do use a standard desktop design even with mobile devices be sure to test your signature on mobile.
Email Signature Generators
There are several excellent email signature generators available online. These are great because they do the work for you. Here’s a short list of good choices:
Let’s take a look at Email Signature Template Generator from HubSpot.
Email Signature Template Generator
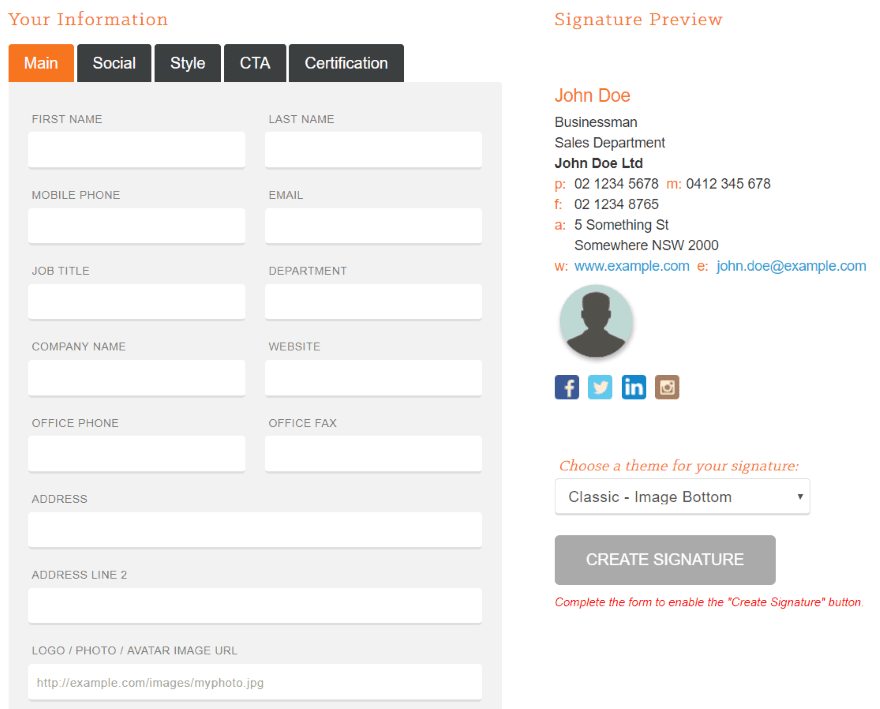
Email Signature Template Generator from HubSpot is a free tool with image layout options, social icons, styling, a call to action, and certifications. It’s intuitive and it provides HTML that you can copy and paste. This generator requires you to include an email address and only has one typeface, but you if you’re familiar with HTML you can customize it easily.

It shows your signature live as you enter the information.
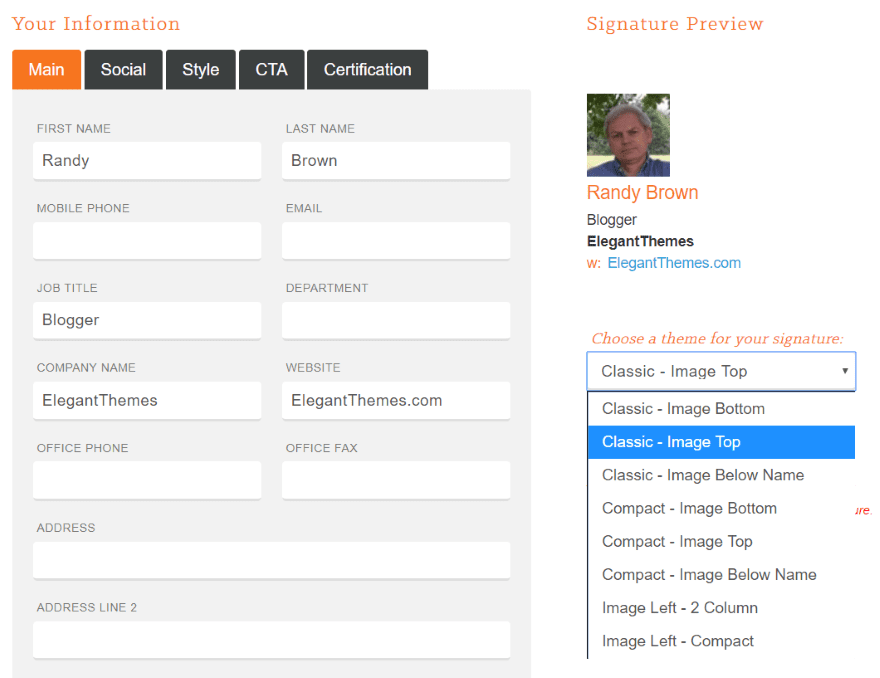
Theme options let you choose the layout you want, which mostly controls the image placement.
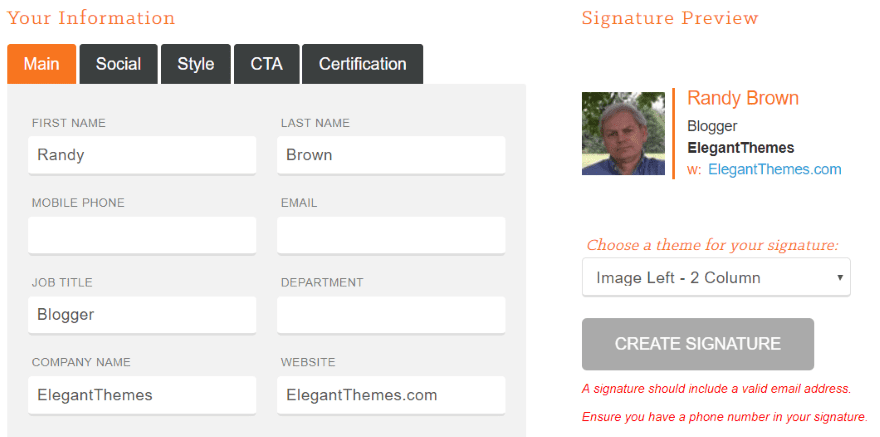
Here’s the basic design using my name, title, the website URL, and image. I chose the 2 column layout with the image on the left. This layout already has 4 lines. I want to add social networks without having too much to look through.
One option is to add a fifth line, but maybe a better option is to remove the company name to keep the layout cleaner. This works in this case because the name is in the URL. Some generators let you make the company name clickable.
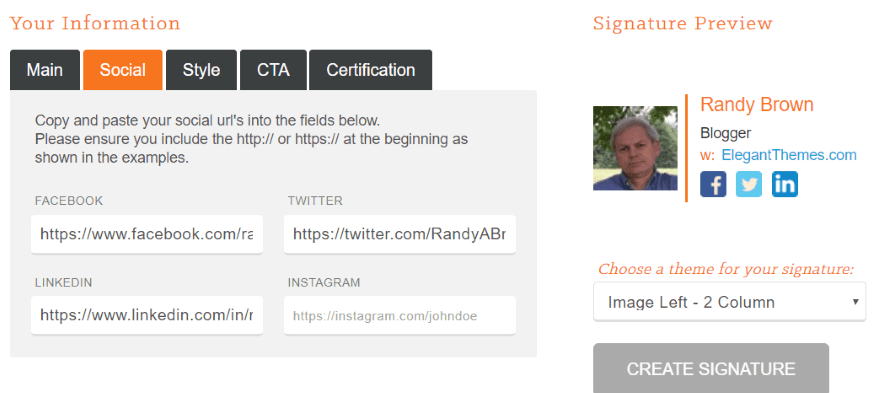
Here’s the new layout without the company name and with social network icons added.
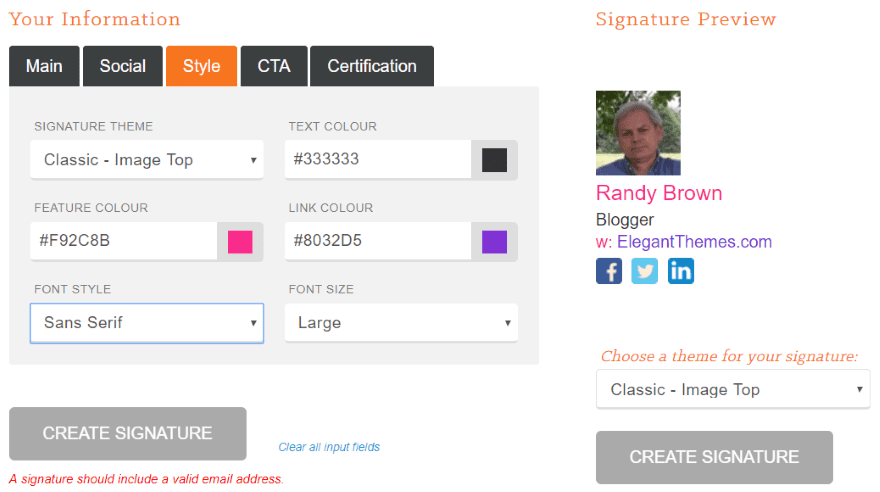
The styling features let you choose the theme, text color, feature color, link color, font style, and font size. In this example, I chose the classic layout with the image on top, added some Elegant Themes’ colors, and set the font size to large.
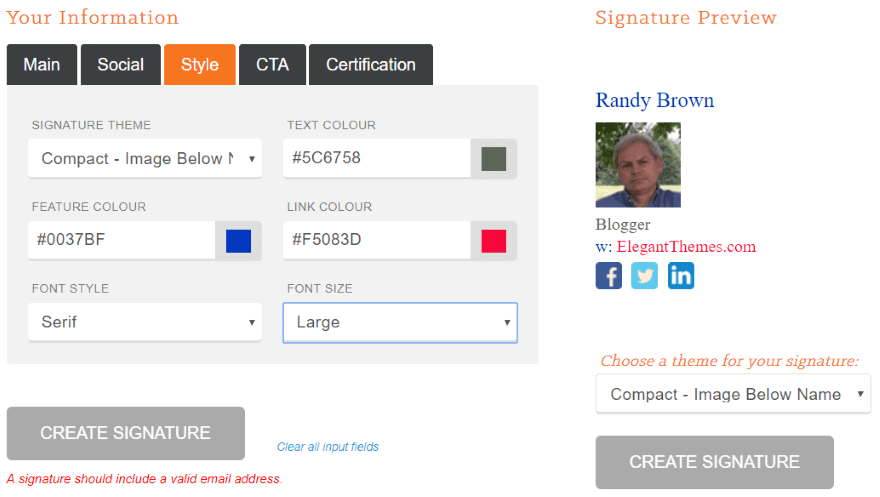
For this one, I used the compact layout with the image below the name and changed the colors. I also chose serif for the font style. With the color and serif/sans serif options you can get it the mood you want.
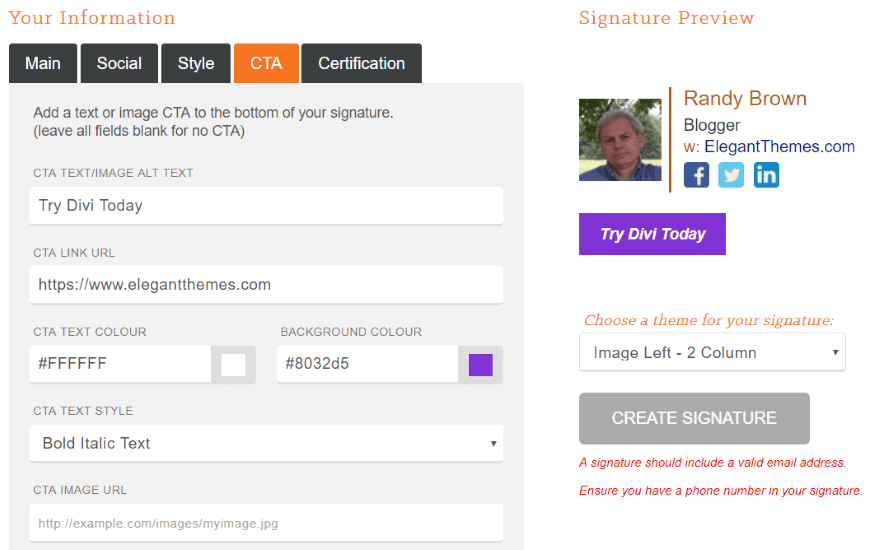
The call to action adds a button with text and a URL. You can enter the text and choose the text color, background color, and text style (choose from normal, bold, italic, or bold italic).
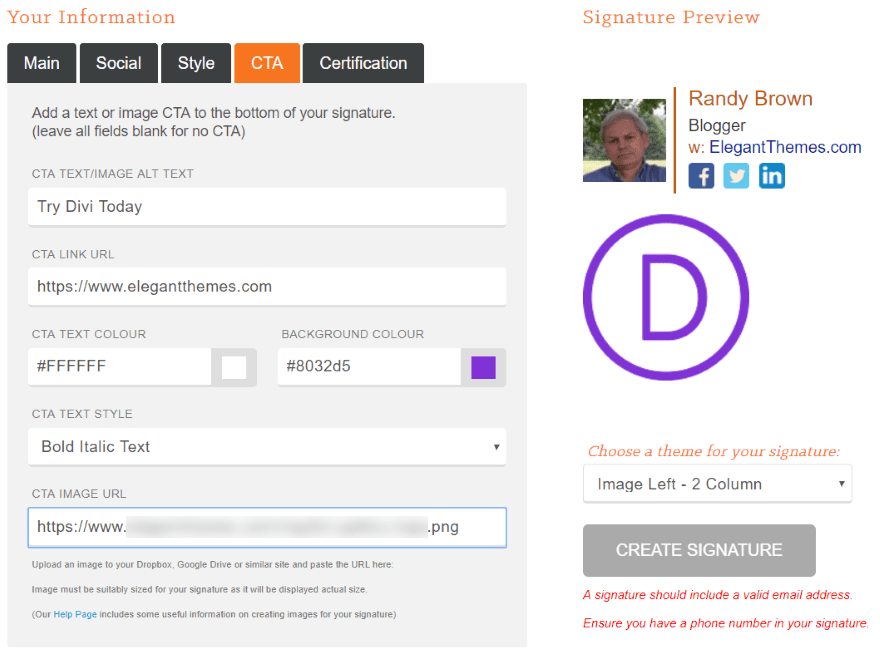
Instead of a button, you can enter an image address. You can’t resize the image here, but you can resize the image in the HTML code that you get once you create the signature.

Add a certification from the list. It places the icon for that certification above the CTA.
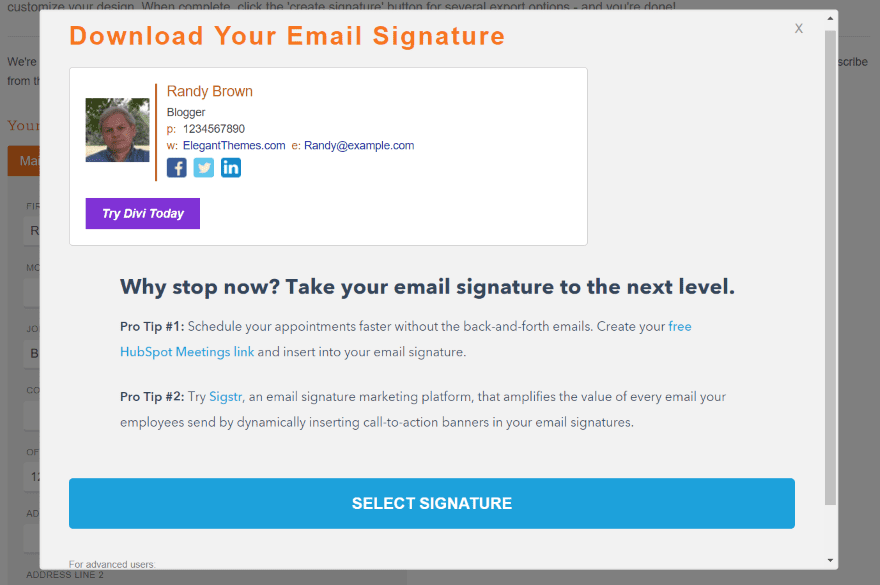
When you’re ready, click Create Signature. It will open a modal where you’ll enter some more information and see the signature.
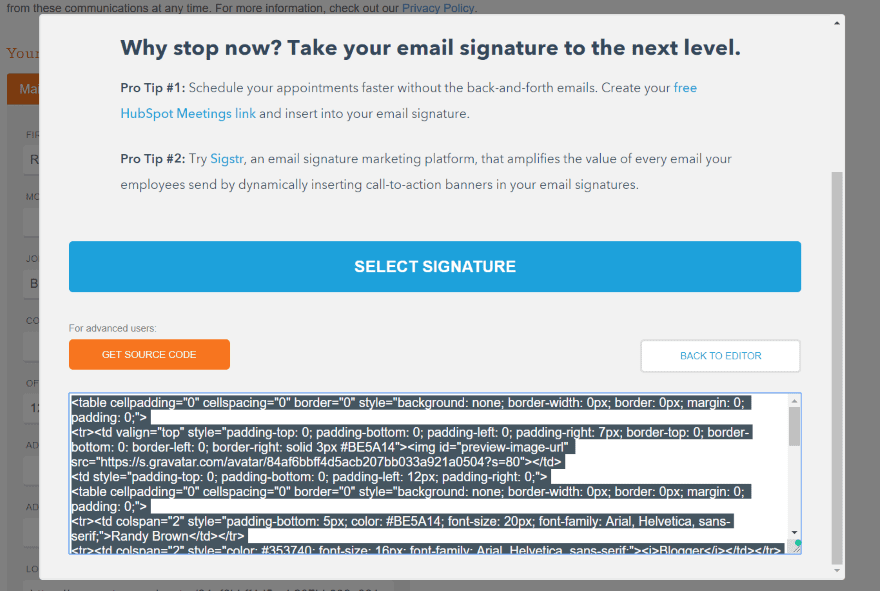
You can either download the signature or select the HTML source code.

Copy the signature and paste it into your email’s settings. You might need to select HTML and choose Source Code. Paste the code into the field.
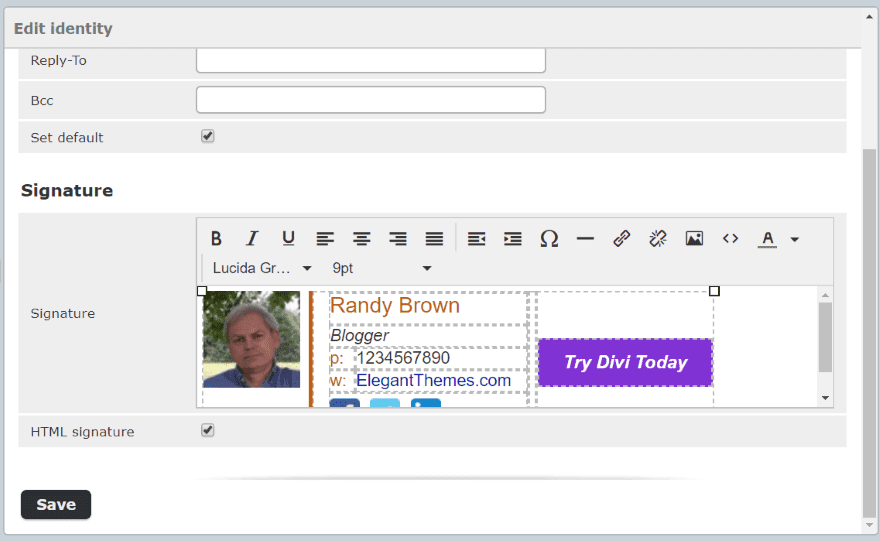
The email signature is now ready to use. I’ve removed the email from the HTML and moved the CTA to the side.
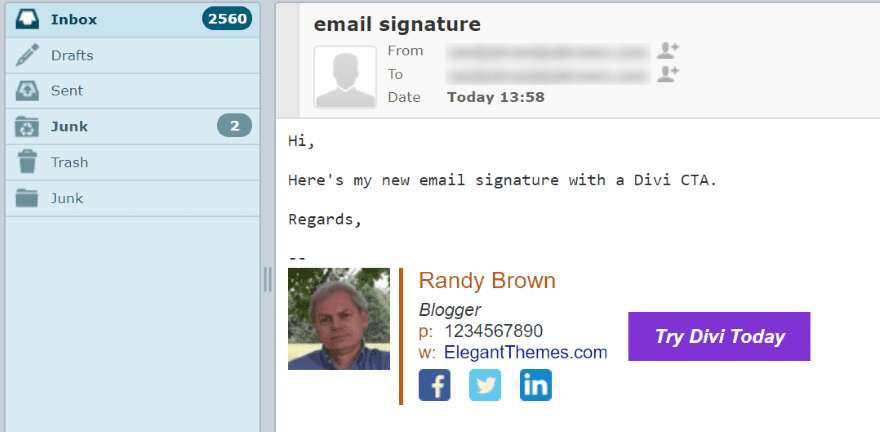
The signature is automatically placed at the bottom of the email. It displays the CTA prominently so it can’t be missed.
Ending Thoughts
That’s our quick look at how to write a professional email signature that converts. The email signature can be a crucial part of your marketing efforts. There’s nothing to lose in using them. They’re easy to set up and use, they make you look more professional, and they help build credibility.
We want to hear from you. Do you use email signatures in your work email? Let us know about it in the comments below.
Featured Image via Sammby / shutterstock.com
The post How to Write a Professional Email Signature that Converts appeared first on Elegant Themes Blog.