How to Add a Dynamic Copyright Year to Your Divi Footer (Automatically Updated)
A yearly copyright notice is one of the most popular elements to add to a website’s footer. Unfortunately, it can be difficult to remember to change the year from one year to the next. The solution is to make the year dynamic. It would pull the date from the server, and you would never have to worry about it. Fortunately, adding a dynamic year to the Divi copyright footer is a simple task. In this article, we’ll see how to add a dynamic copyright year to your Divi footer so it will update automatically.
Preview
Here’s how the Divi copyright footer will look on desktop and mobile.
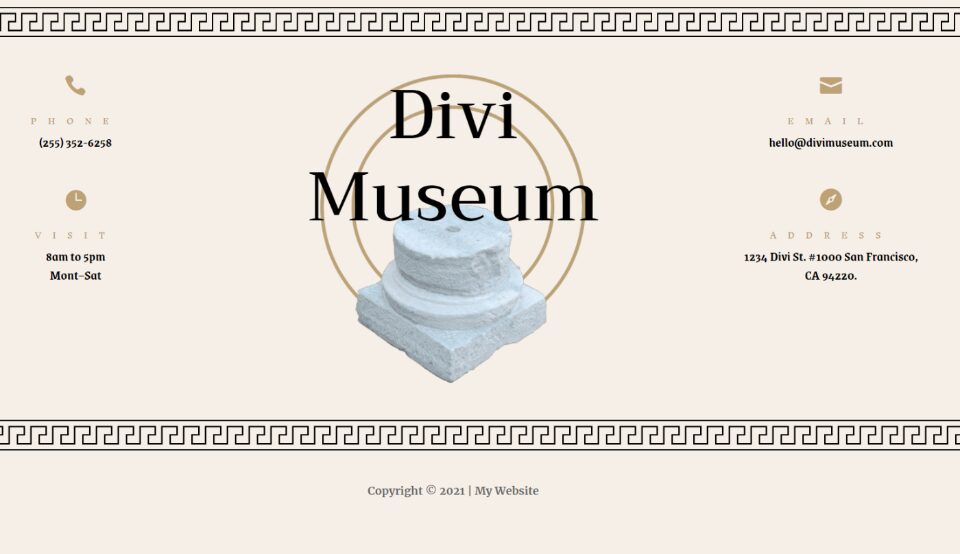
Divi Copyright Footer Desktop
Here’s how the Divi copyright footer will look on the desktop.
Divi Copyright Footer Mobile
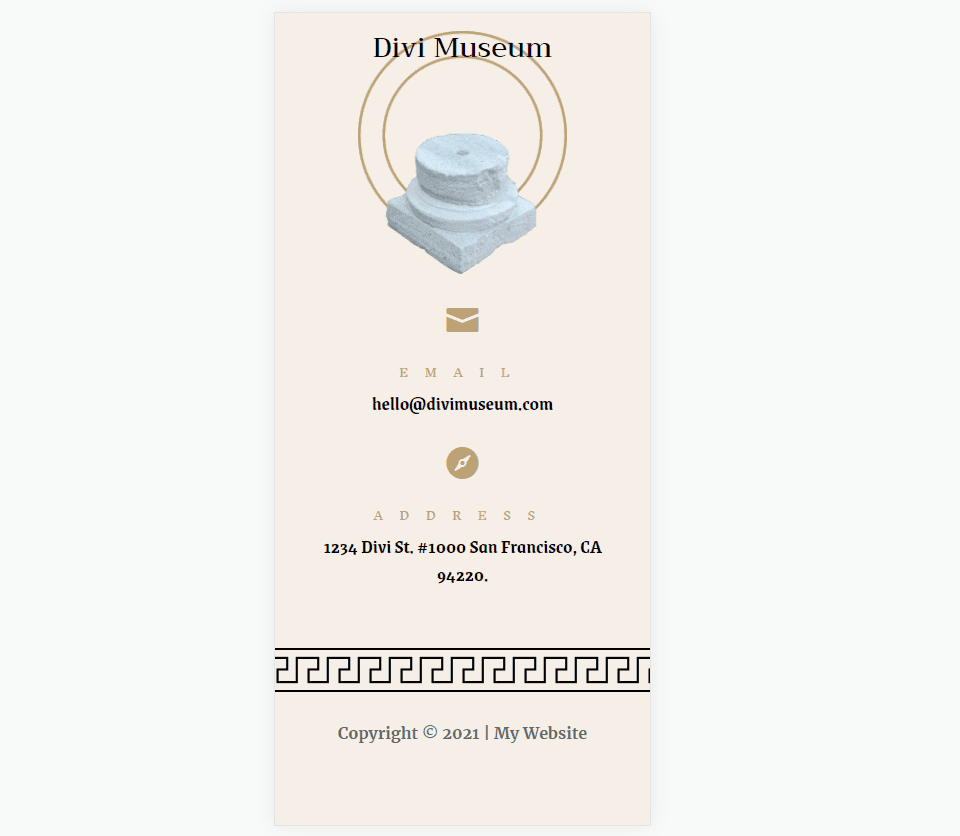
Here’s how the Divi copyright footer looks on mobile.
Create or Upload a Footer Template
First, you’ll need a footer template for the Divi Theme Builder. You can create your own or use a premade footer template. Any footer template will work. I’ll show both methods. For styling, you’ll just use the colors and fonts for your template instead of mine.
There are lots of free footer templates that are designed to work with the free Divi layout packs. Many of them already include a dynamic copyright year. To find them, search for “free footer” in the Elegant Themes blog.
For my examples, I will create a new Divi copyright footer using elements from the free Museum Layout Pack.
Method one: Uploading a Divi Footer Template
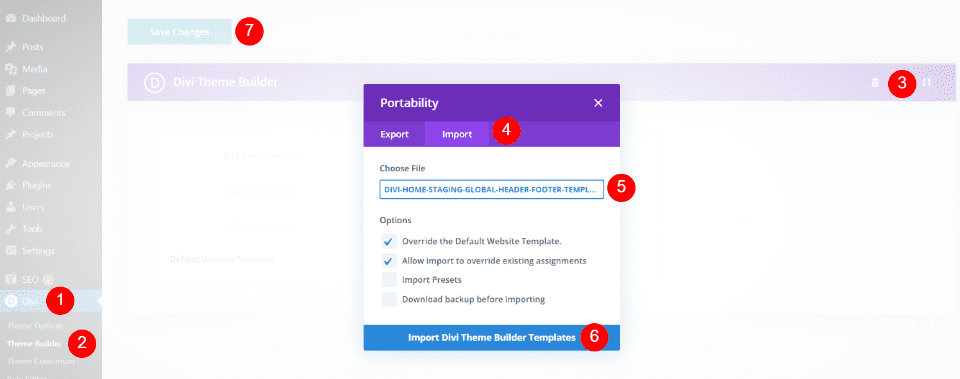
Download the footer template and unzip the file. Go to Divi > Theme Builder in the WordPress dashboard. Click Portability in the upper right corner. In the modal that opens, select Import and click to choose the file. Navigate to the file on your computer, select it, and click Import Divi Theme Builder Templates. Delete the header template if you don’t want to use it and click Save Changes in the upper left corner.
You can now edit your footer template. You can edit within the Theme Builder by clicking the edit options or editing on the front end. I like to edit on the front end so I can see how the styling works with my page design.
Method Two: Create a New Template in the Divi Theme Builder
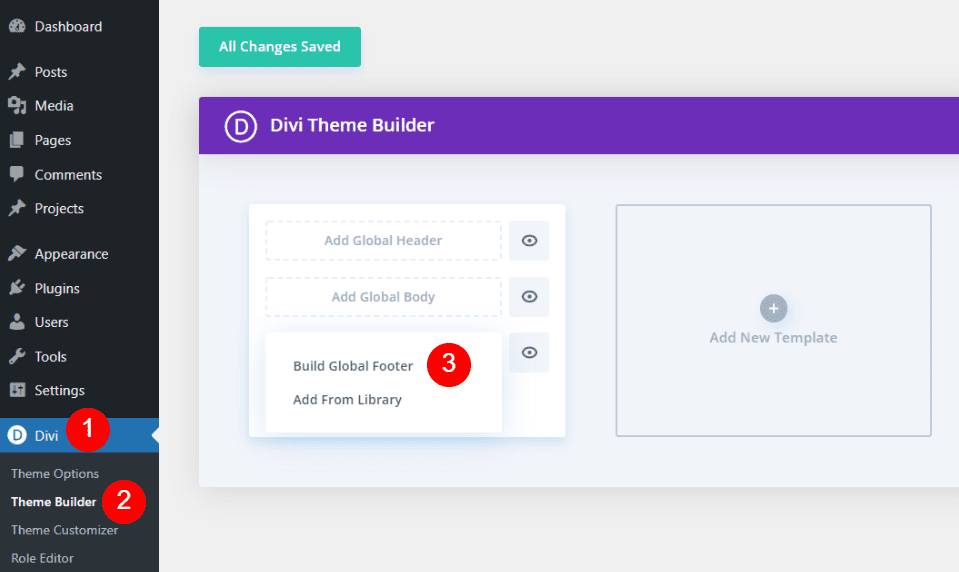
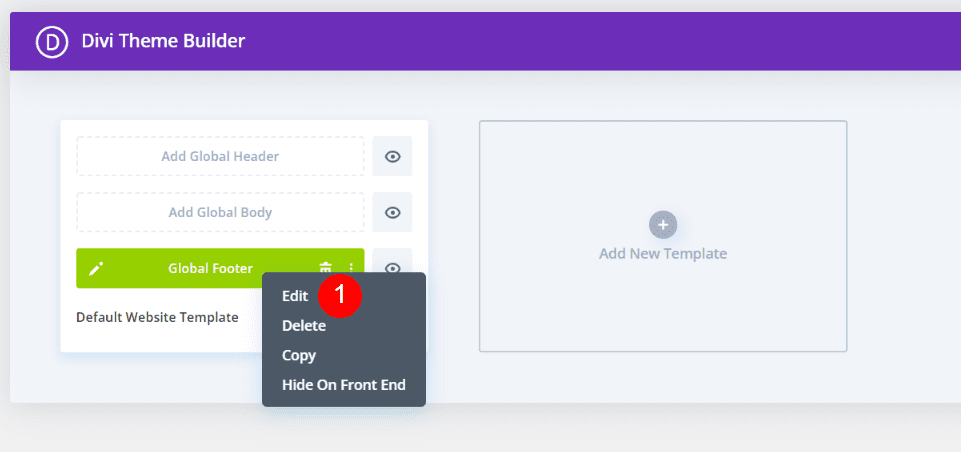
I plan to create a new footer template using the Divi Museum Layout Pack. Go to Divi > Theme Builder in the WordPress dashboard. Click Add Global Footer and select Build Global Footer from the options.
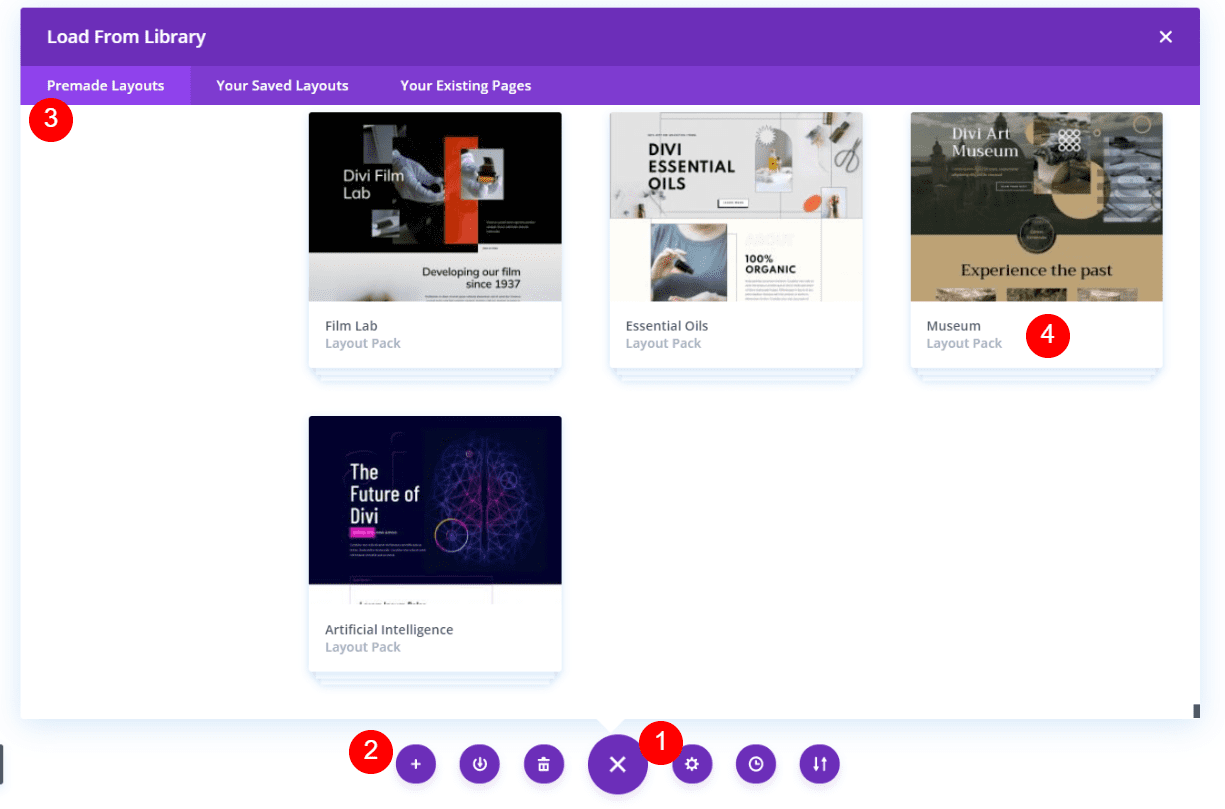
Your options may differ depending on your Divi settings. Open the Divi menu and click Load from Library. In the modal that opens, choose Premade Layouts and select the layout you want to use.
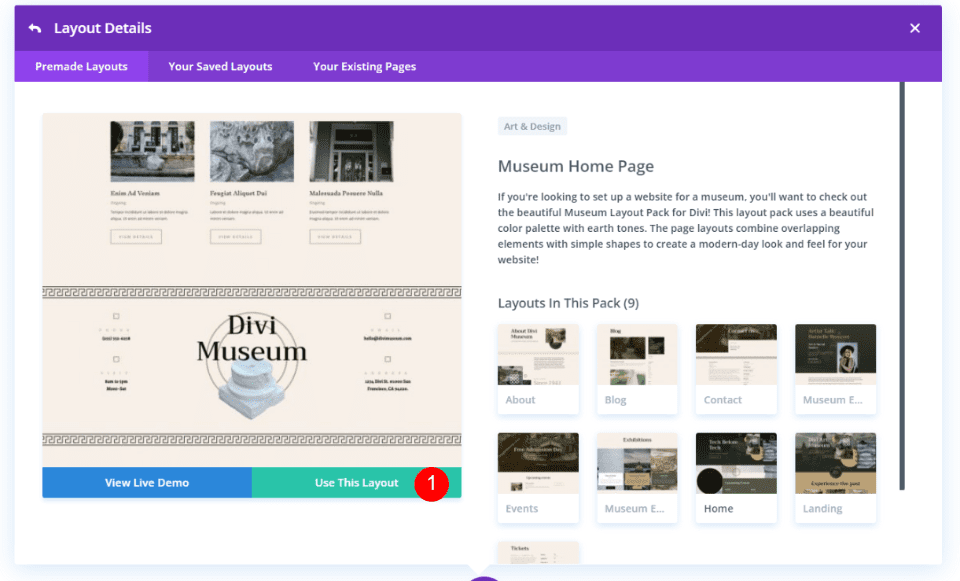
Click on the layout you want and select Use This Layout.
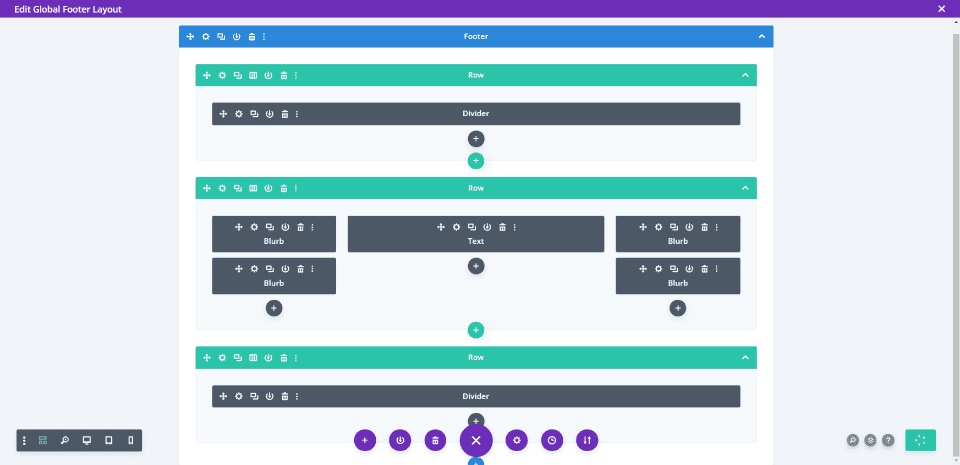
Once the page loads, delete everything you don’t want to include in your footer. This layout pack includes a footer within each of its page templates. I’ll use this footer as my global footer. This means I’ll have to delete the footer from any page I create using the Museum Layout Pack.
Alternately, I could just create a bottom row as the global footer that would work with the layout under the footer that’s included with the pages. Either method works fine.
We can now add the Divi copyright footer to our new global footer.
Add a Text Module
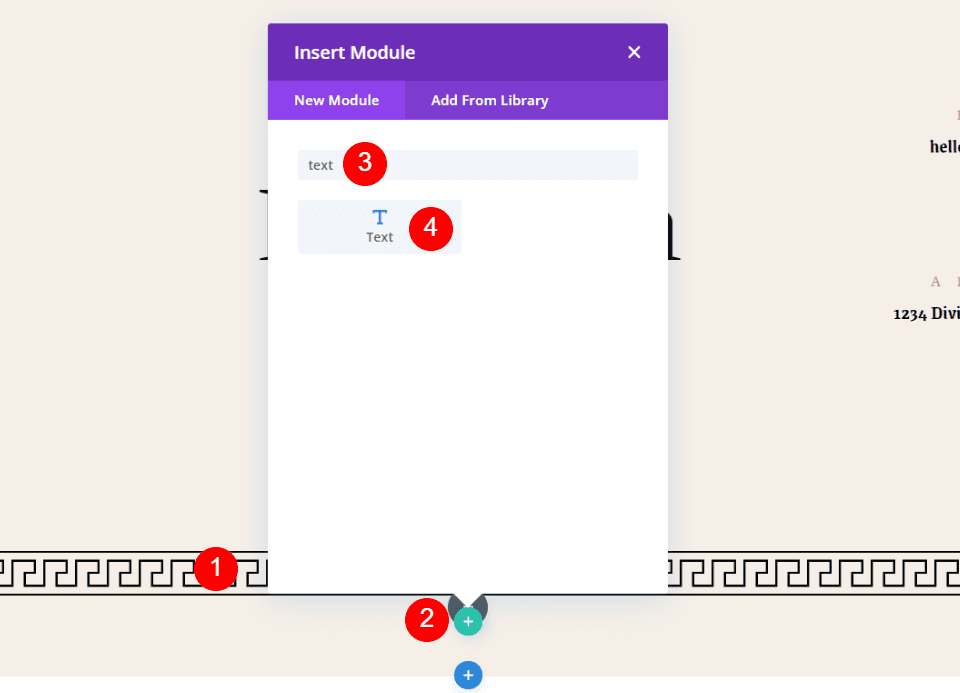
Regardless of how you created your footer, the next step is to add a text module. Hover over the last module at the bottom of the page. When you see the dark gray plus icon, click it to open the module selections. Search for Text and click the Text module. This adds a text module as the last module on the page.
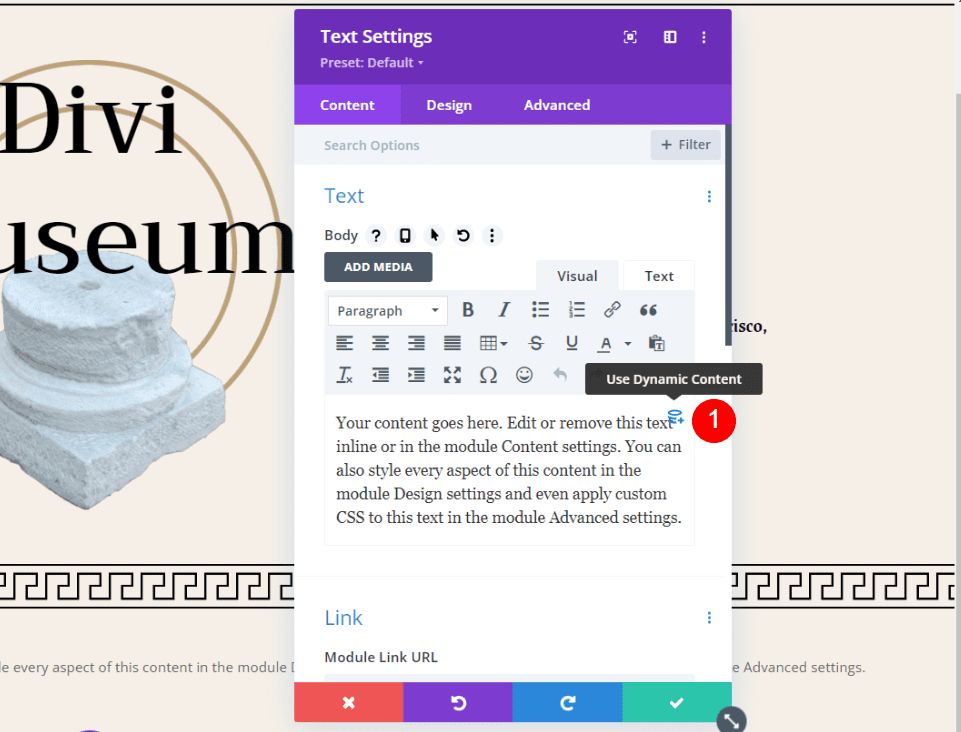
The text module will open where you can add your content. Hover over the content area to see a dynamic icon in the upper right. Click this icon to use dynamic content.
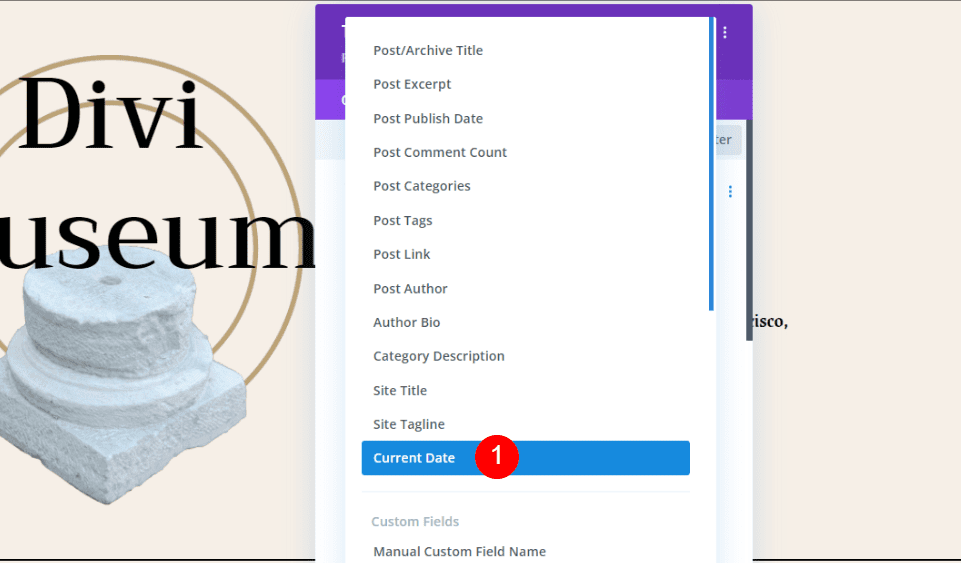
This opens a list of dynamic content that you can use for your text content. Select Current Date.
Add the Divi Copyright Footer Information
You can now add the information to the fields. You’ll have three fields for information:
- Before
- After
- Date Format
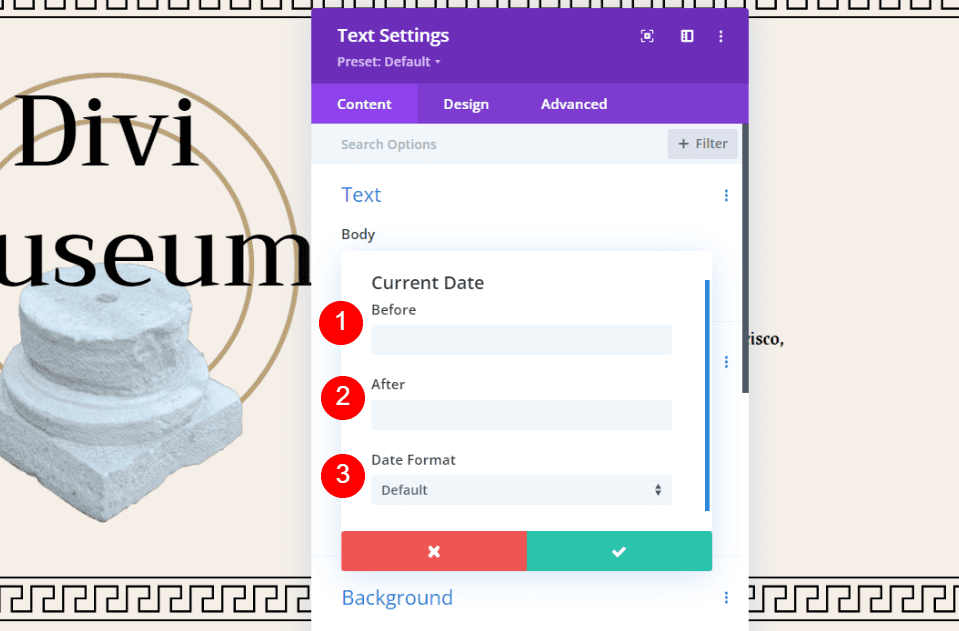
Add the Copyright in the Before Field
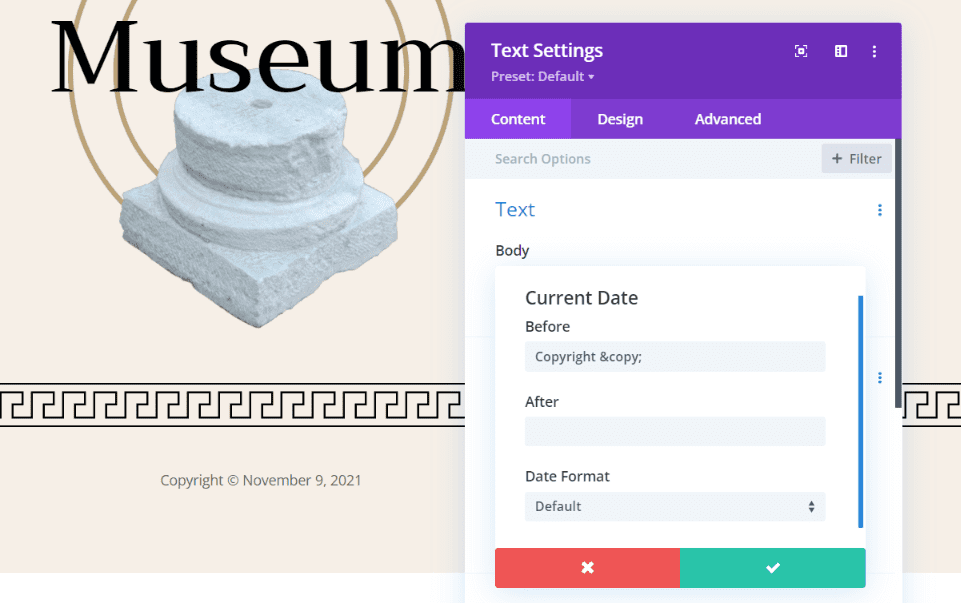
Place the copyright notification in the Before field. To add a copyright symbol, enter © into the field. For the full copyright phrase, enter “© Copyright “, or “Copyright © “ if you want the symbol to appear after the word. This is my preferred method. Notice I’ve added a space at the end. This adds a space between the copyright and the date. The copyright notice and symbol automatically appear in the footer.
You can also enter the symbol manually. The method for adding it will differ depending on your system. On Windows, hold the alt key and type 0169 on your number pad. You can also copy it from somewhere and paste it.
Add Website Information in the After Field
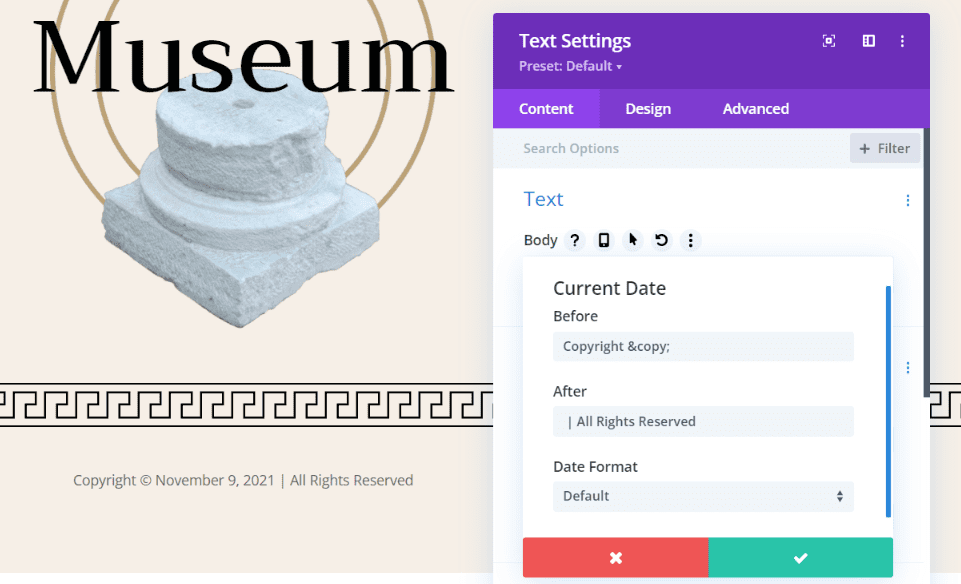
Place your website’s name and any message you want in the After field. The message could be something like “All rights reserved”. You can also add your website’s name. Add a bar between the After text and date, like this “| All Rights Reserved”. I’ve added a space before the text. This adds space between the date and text.

You could link to your privacy policy or similar pages. Links are added with HTML. For example, if you want your website clickable, add this HTML with your link and website’s name. Be sure to include the space at the beginning of the name. Here’s my example:
[HTML] Example Website [/html]
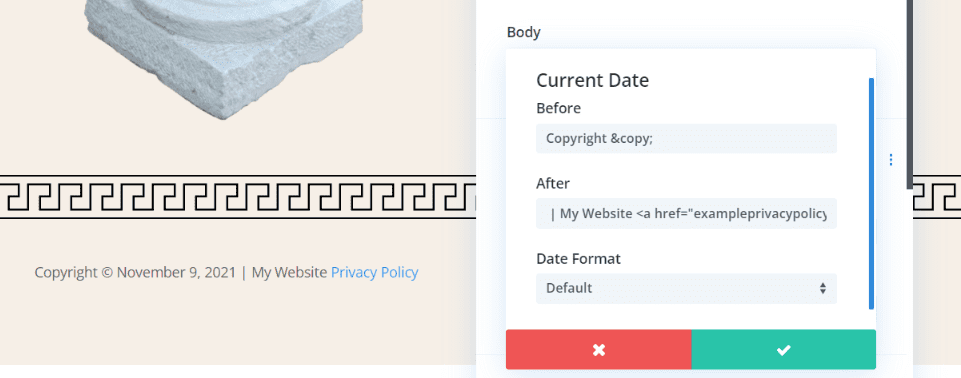
You can also add a link to a different page. Add the HTML as normal and place your website’s name before the HTML. Be sure to include the extra space. Here’s my example:
| My Website <a href="exampleprivacypolicy.com"> Privacy Policy </a>
Customize the Divi Copyright Footer Date Format
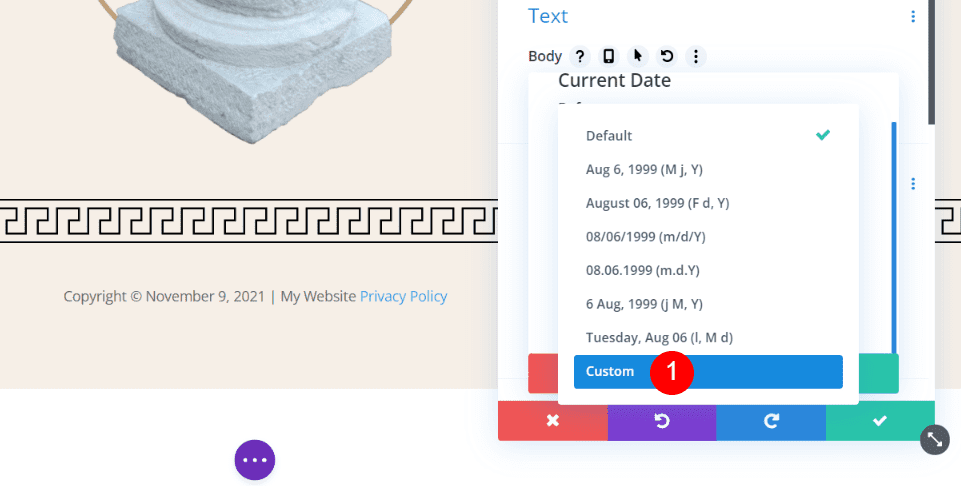
Next, we’ll choose the date format. Click the Date Format dropdown to see your options. The options include the current day as well as the year. We just want the year. For the dynamic year, you’ll need to choose Custom in the Date Format options.
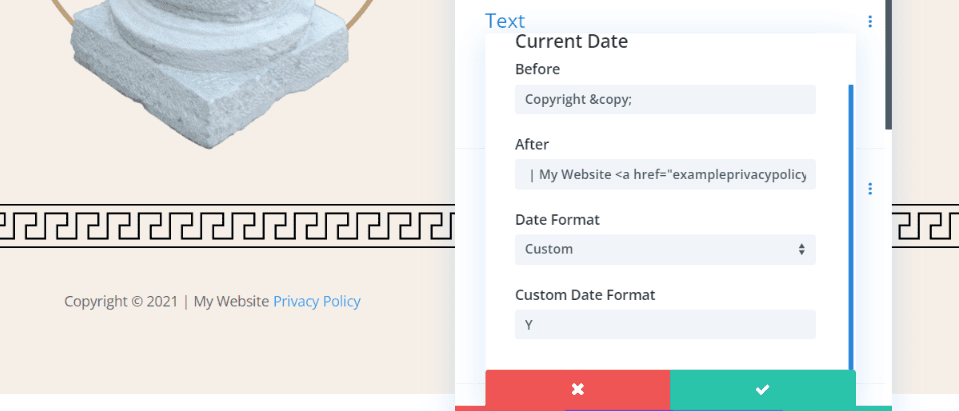
For the year, type Y. The upper-case Y shows the full year. You can also use a lower-case y. This shows the last two digits of the year.
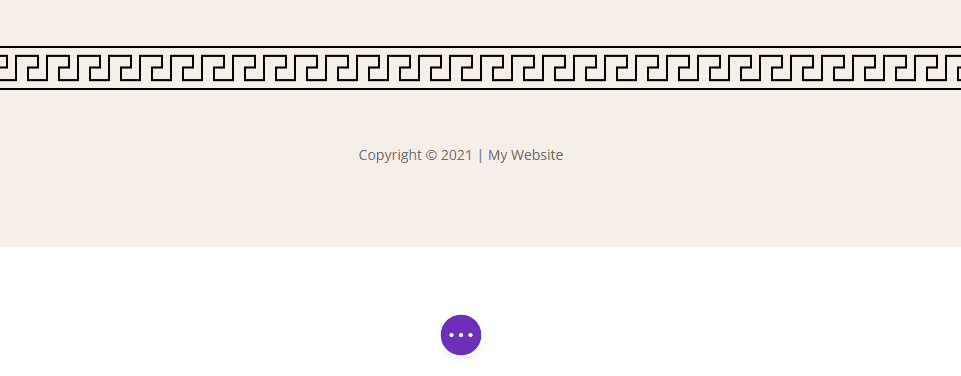
Mine design shows my copyright notice with the symbol after the word, the full year, and the website name. Now it’s time to style the Divi copyright footer.
Style the Divi Copyright Footer
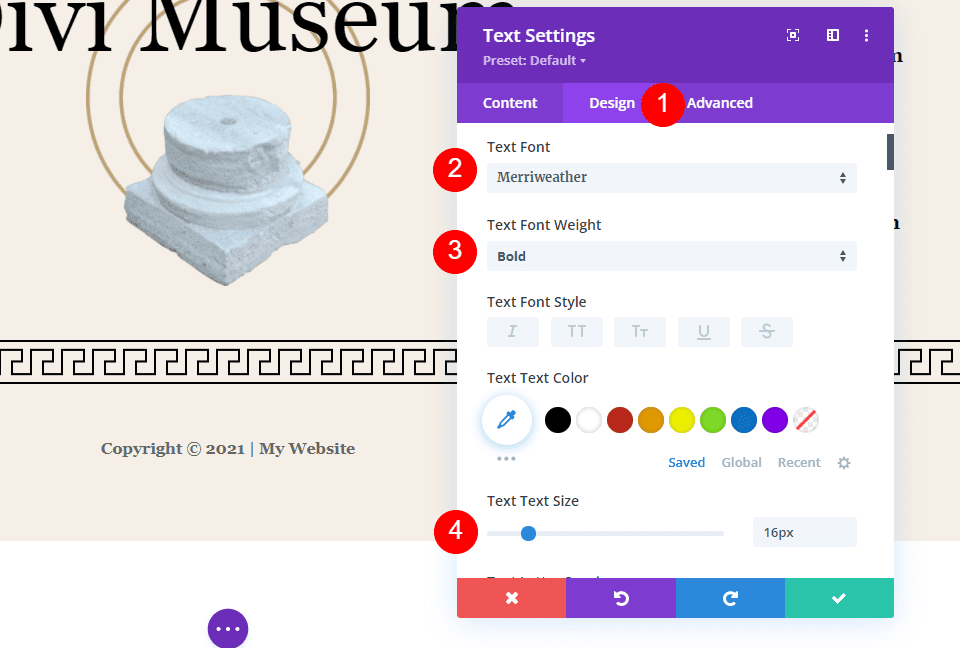
To style our Divi copyright footer, we’ll use colors and fonts from the layout. We’ll keep this one simple since we’re not trying to draw attention to it. Click on the Design tab and choose Merriweather for the font, select bold, and increase its size to 16px. That’s it. We’ll leave everything else at their default settings.
- Text Font: Merriweather
- Text Font Weight: Bold
- Text Text Size: 16px
Now, save your settings and exit the builder.
Results
Here’s how the Divi copyright footer looks on a desktop and mobile.
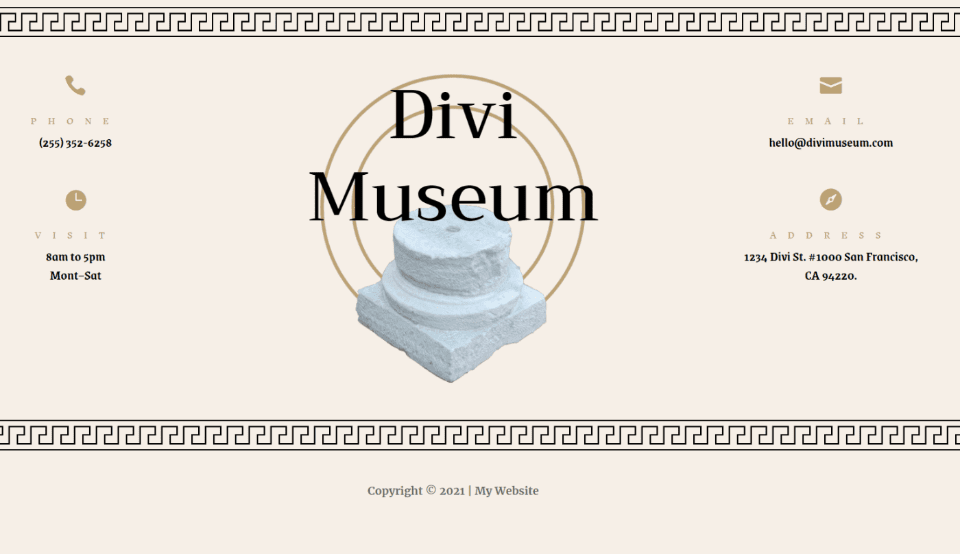
Divi Copyright Footer Desktop
Here’s how the Divi copyright footer looks on the desktop.
Divi Copyright Footer Mobile
Here’s how the Divi copyright footer looks on mobile.
Ending Thoughts
That’s our look at how to add a dynamic Divi copyright footer to your website. Divi has this feature built into its dynamic options, making it easy to add. You have several options for displaying the date. Once you’ve added it, the date will automatically change to match the year. You’ll never have to adjust the text again.
We want to hear from you. Have you added a dynamic Divi copyright footer to your website? Let us know about your experience in the comments.
The post How to Add a Dynamic Copyright Year to Your Divi Footer (Automatically Updated) appeared first on Elegant Themes Blog.